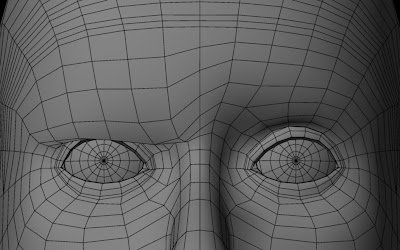
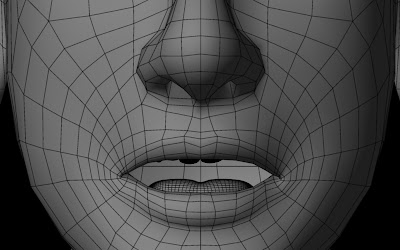
- Rigging is a difficult skill in itself, and facial rigging is quite advanced. However, any good modeler can easily approach blend shapes with fair success.
- For a short project, a few blends will usually be enough to hit very specific expressions without spending a huge amount of time on it.
- Blends are very consistent. While a rigged face gives the animator more control, a long project with many animators benefits more from consistency.
Creating Blends
- Select the head and press CTRL + D to duplicate it. Repeat until you have enough duplicates for all your blends
- Position them to one side in groupings of Eyebrow, Eye, Mouth and Phonemes
- Select all the duplicates and then SHIFT select the base head mesh (make sure the base head is green)
- In the animation menu bar, go to Create Deformers > Blendshapes
- Go to Window > Animation Editors > Blend Shape
Eyebrows
 | |
| BrowInDown BrowOutDown |
 |
| BrownInDown and BrowOutDown applied together |
 |
| BrowInUp & BrowOutUp |
 |
| BrowInUp and BrowInDown applied together |
This shows the blends on the Left side (character's right) only. Start by creating the four blends independently from each other, then dial the inner and outer of each on the base head up in combination. With two frames visible (one looking at the base head, the other looking at a blend), modify the blends until they flow together nicely as in the 3rd and fourth render above.
Eyes
 |
| Blink |
Often, a blink will cut through the eyeball at 50%. To solve this problem, you can make an in between.
- Count along the blend shapes in the blend shape window to the blink, this is the target index number of that blend. Write the number down
- Dial the blink to 50% on the base head and use CTRL + D to duplicate it
- Move the in between blend to the side to work on it
- Select the in between then the base head and go to Edit Deformers > Blend Shape > Add and click the options box beside Add
- Check the specify node box and select blendShape1
- Check the Add in-between target box and put the In-between weight to .5
- Fill in the target index that you checked earlier and apply
It can be useful to also create the upper eyelid and lower eyelid movements as separate blends.
Mouth Expressions
Mouth blends can include expressions such as a smile, a frown or a pout, but for more control you can do general movement blends too. Moving the mouth up and down a bit, rolling the lips in and out, widening and narrowing the mouth and peeling back the lips are all very useful blends. Many of these blends will need a left and right version that need to blend together in the same way as the eyebrows. This example will show another method of getting this affect with the smile blend. Make sure you have two copies of the blend before doing this so that you can repeat the process for the other side.
Note that the head should be unwrapped before attempting the following!
- using the move tool, turn on reflect in the tool menu
- use the radial menu to go to vertex mode and press 'b' to use soft select
- hold down 'b' and then the left mouse button and move the mouse up and down to change the size of the soft select
- use soft select to model a symmetrical smile
- Add a blank blend to the smile and dial it up
- With the smile blend selected, go to Edit Deformers > Paint blend shape weight tool and click the options box
- Scroll down the options, turn the value to zero and click flood
- Press 'Q' to deselect this tool and go into vertex mode to select half the vertices
- Press 'Y' to reselect the weight tool and turn the value back to 1, clicking flood again
- Repeat the last two steps, but select the central line of the face and set the value to .5
- Press 'Q' again, and select the blend in object mode
- Change the Paint Operation to smooth and click flood a few times to soften the transition
Phonemes
Phonemes are sound blends used for lip syncing. A full list might include A/I, M/B/P, Ooo, E/D/S, F/V, U/R. These should be used in combination with a rigged jaw and the teeth and tongue to get a full range.
Here are some examples
 |
| AI |
 |
| MBP |
 |
| Ooo |
Editing the base mesh
Sometimes it's necessary to edit the base mesh after creating blend shapes.
- Delete history of base mesh and blends before starting
- Make sure all the blends are applied to the base mesh
- Do all your edits
- Hold the right mouse button down over the base mesh and select Inputs > All inputs...
- If Blend Shapes is not at the bottom of the list, drag it down to the bottom using the middle mouse button
- Close the window and go to vertex mode
- Select a vertex, then hold SHIFT and the right mouse button down on the mesh and select Transform component
- Go back to object mode and go to Edit Deformers > Blend Shape > Bake Topology To Targets


No comments:
Post a Comment