Saturday, November 12, 2011

Lesson 5 - Blend Shapes

Blend shapes (aka morph targets) are one way to animate facial movements and expressions.  It is often preferable to rig a face, and the best blends break up movements in a similar way to a rig.  However, there are some advantages to blends, which is why they're still in use.

  • Rigging is a difficult skill in itself, and facial rigging is quite advanced.  However, any good modeler can easily approach blend shapes with fair success.
  • For a short project, a few blends will usually be enough to hit very specific expressions without spending a huge amount of time on it.
  • Blends are very consistent.  While a rigged face gives the animator more control, a long project with many animators benefits more from consistency.


Creating Blends

  • Select the head and press CTRL + D to duplicate it.  Repeat until you have enough duplicates for all your blends
  • Position them to one side in groupings of Eyebrow, Eye, Mouth and Phonemes
  • Select all the duplicates and then SHIFT select the base head mesh (make sure the base head is green)
  • In the animation menu bar, go to Create Deformers > Blendshapes
  • Go to Window > Animation Editors > Blend Shape
 I currently use up to 65 blends on a single character, but for a small scale project 10 - 20 may be enough.  In this lesson we'll use a few of the most important ones.


Eyebrows
BrowInDown  BrowOutDown
BrownInDown and BrowOutDown applied together
BrowInUp & BrowOutUp
BrowInUp and BrowInDown applied together

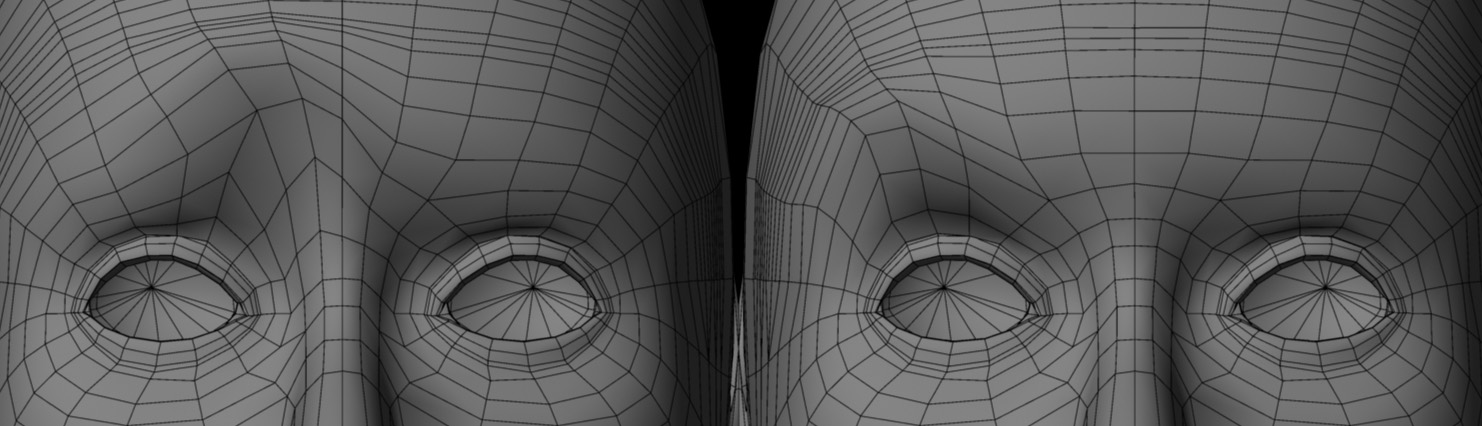
This shows the blends on the Left side (character's right) only.  Start by creating the four blends independently from each other, then dial the inner and outer of each on the base head up in combination.  With two frames visible (one looking at the base head, the other looking at a blend), modify the blends until they flow together nicely as in the 3rd and fourth render above.
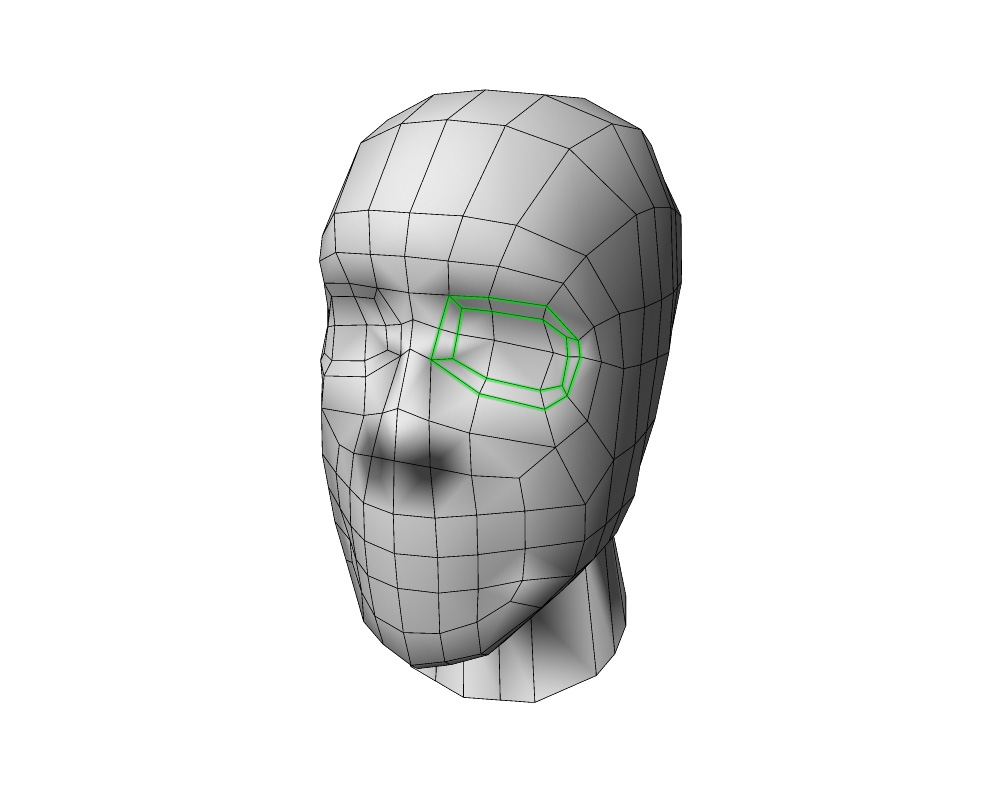


Eyes

Blink
The blink is pretty self explanatory.  Start by getting the shape right from the front and then test it on the base head.  Usually the eyeball cuts through a bit, so pull it forward until it just covers the eyeball.

Often, a blink will cut through the eyeball at 50%.  To solve this problem, you can make an in between.
  • Count along the blend shapes in the blend shape window to the blink, this is the target index number of that blend.  Write the number down
  • Dial the blink to 50% on the base head and use CTRL + D to duplicate it
  • Move the in between blend to the side to work on it
  • Select the in between then the base head and go to Edit Deformers > Blend Shape > Add  and click the options box beside Add
  • Check the specify node box and select blendShape1
  • Check the Add in-between target box and put the In-between weight to .5
  • Fill in the target index that you checked earlier and apply
Now, when you dial up that blend shape, it will go to the in between at 50% and then the full blend at 100%.  All you have to do is modify the in-between so that the eyelid sits over the eyeball correctly.

It can be useful to also create the upper eyelid and lower eyelid movements as separate blends.


Mouth Expressions

Mouth blends can include expressions such as a smile, a frown or a pout, but for more control you can do general movement blends too.  Moving the mouth up and down a bit, rolling the lips in and out, widening and narrowing the mouth and peeling back the lips are all very useful blends.  Many of these blends will need a left and right version that need to blend together in the same way as the eyebrows.  This example will show another method of getting this affect with the smile blend. Make sure you have two copies of the blend before doing this so that you can repeat the process for the other side.

Note that the head should be unwrapped before attempting the following!
  •  using the move tool, turn on reflect in the tool menu
  • use the radial menu to go to vertex mode and press 'b' to use soft select
  • hold down 'b' and then the left mouse button and move the mouse up and down to change the size of the soft select
  • use soft select to model a symmetrical smile
 
  • Add a blank blend to the smile and dial it up
  • With the smile blend selected, go to Edit Deformers > Paint blend shape weight tool and click the options box
  • Scroll down the options, turn the value to zero and click flood
  • Press 'Q' to deselect this tool and go into vertex mode to select half the vertices
  • Press 'Y' to reselect the weight tool and turn the value back to 1, clicking flood again
  • Repeat the last two steps, but select the central line of the face and set the value to .5
  • Press 'Q' again, and select the blend in object mode
  • Change the Paint Operation to smooth and click flood a few times to soften the transition


Phonemes


Phonemes are sound blends used for lip syncing.  A full list might include A/I, M/B/P, Ooo, E/D/S, F/V, U/R.  These should be used in combination with a rigged jaw and the teeth and tongue to get a full range.

Here are some examples
AI

MBP

Ooo


Editing the base mesh

Sometimes it's necessary to edit the base mesh after creating blend shapes.
  • Delete history of base mesh and blends before starting
  • Make sure all the blends are applied to the base mesh
  • Do all your edits
  • Hold the right mouse button down over the base mesh and select Inputs > All inputs...
  • If Blend Shapes is not at the bottom of the list, drag it down to the bottom using the middle mouse button
  • Close the window and go to vertex mode
  • Select a vertex, then hold SHIFT and the right mouse button down on the mesh and select Transform component
  • Go back to object mode and go to Edit Deformers > Blend Shape > Bake Topology To Targets
All your blend shapes should now be updated with the changes on the base mesh

Tuesday, October 25, 2011

Lesson 4 - Facial Modeling


This lesson is quite advanced.  It assumes you will reference back for basic modeling and instead focusses on the best structure to work with when starting a head model.

Once again, I'd like to start by pointing out that modeling a head takes a very long time.  I previously mentioned that it can take me 12 - 16 hours to create a first draft character.  The head can be more than half of that, and can sometimes take from a couple of days to weeks to finalise.

Like everything in Maya, there are a million ways to approach facial modeling.  However, there are some things to keep in mind when optimising your model for animation.  The structure surrounding the eyes nose and mouth are very important, and before worrying about the appearance of your model, you should try to start with a sound foundation.


Loop Layout

When starting a head, it's best practice to reuse something you've worked on before.  Get rid of any extra loops you don't need and rework the model to the new design.  However, you have to start somewhere and sometimes designs defy reuse anyway, so we're going to start from scratch.


Create a box and simply shape it into a rough head to start.  Try to keep a straight lines horizontally.  (I've also extruded the neck here, but it's usually better to leave that untill later on as you'll be adding a lot of loops that might complicate the neck area_.


Next, you should use extrude to create a mask and snout section. 


The mask section encompases the brows and eyes and needs to be able to operate as a single piece to create the majority of expressions in a character.  The snout should house the nose and mouth.  It's not always necessary to unify the nose and mouth, but it will help create believeable deformation when the mouth is really stretching into a smile, for example.

Now, within the mask, extrude in each eye socket.  The socket should take up most of this space even if the eyes are quite small.  The area should leave room for a lot of brow movement as well as space for eyelids.


And lastly, extrude the mouth and nose.  The nose should be placed either, within the snout, or along the front of the head, with the lowest point in the snout.  The mouth should be extruded just below the nose.


Very few face designs stray too far from this basic structure.  The most common changes would be to leave out the nose or vary the proportions.  At this point you want a really clean model, so don't be afraid to spend a good amount of time making sure you have good, evenly spaced topology.

You can extrude the ears at this point, but the technical layout isn't too important.  They are tricky though, so it can be helpful to work on them seperately as wth a prop and then attach them later.


Inside the Mouth

Commonly overlooked, the inside of the mouth is an essential component for any character model.  It's easy to just create a crease, and an art director will often just okay it without thinking about it.  This problem can be missed right up untill the character gets to blend shapes or rigging, at which point the piepline would have to get completely back tracked.

There are three components to keep in mind for a basic mouth setup:

  • The mouth cavaty.  The mouth must be extruded into the the head to create adequate space between the lips and the back of the throat.
  • The teeth.  Often lower teeth are left out of more stylised designs, but you usually need upper teeth at least.
  • Tongue.  This can be modelled as part of the cavaty, but it's usually more straight forward to create it as a seperate object.
Teeth and tongue can be approched in the same way as prop modeling, and then possitioned in the mouth at the end.  However, the cavaty of the mouth is a bit tricky.


First select the mouth and extrude in.  Enlarge the back of this extrusion to create the cavaty and insert a couple of loops to refine it.  Make sure the space pulls up and down from the lips just inside the mouth and that it gets slightly wider as it goes back.

To isolate the inside of the mouth, slecet the faces required and go to Show > Isolate Select > View Selected


Once you have the cavaty in shape, focus on the lips.  Add a few loops to allow definition and make sure the lips close together when smoothed.


Eyes

The best approach to eyes is almost always a sphere in a socket.  Some character designs require different approaches which I may go into further if people have specific questions on solving such issues, but for now I'll just stick with the basics.

Extrude the socket in to create space for the sphere, then create the eyeball before refining it any further.


The eyeball should be a good bit larger than the required visible area of the eye.  If you want a more realistic look, you can try extruding a mound at the front to creat a cornea and modeling an iris just inside, but it's usually adequate to just use a sphere.


Once the eyeball is there, you should be able to build the eyelids around it.  Don't extrude the lids seperately, but keep a clean loop around the whole space and tighten the geometry at the corners to get the points.

Again, it takes a long time to refine the detail and shape you need in a face model, but you should now have a good foundation on which to work.

Wednesday, October 19, 2011

Lesson 3 - Character Modelling

Character Modelling

Modelling a character takes a long time 12-16 hours first draft. After that, it depends on how much added detail there is, and how close you can get to the directors vision. If you don't feel comfortable with the maya tools, stick with props for a while.  Characters are very challenging and can get quite technical if you expect to rig and animate them.

Single Mesh bodies

There are two reasons to use a single mesh body. One is that you're design is very, very simple and you want the rigging to be as straight forward as possible. The second, when working on high budget films or cut scenes, is when you're using the character model to hang sim cloth clothing on.

Pro's
  • Avoids overlapping Geometry
  • Joints are clearly visible and easy to access when skinning 
  • Allows you to add sim clothes over the mesh  
Cons
  • Complicates editing base mesh after blends 
  • Difficult to add a-symmetrical detail without breaking quads 
  • Only works with very straight forward designs  

Broken Mesh bodies

This is a more common way to approach character modeling in games and tv. The head and each item of clothing should be separated for easy access.

Pro's
  • Easier to hide elements you're not currently working on 
  • Separate head makes editing blends much easier 
  • Cleaner lines 
Cons
  • Separate detail must line up with points on the mesh (buttons on verts, belts over loops) 
  • Important to delete interior detail  


Starting you model

It's important to keep a few things in mind when starting a model so as to avoid complication later on. A character model should be properly scaled, centered in the scene and kept symmetrical for as long as possible. (A-symmetry can be added as a blend if required).


Scale Reference

Polygon tab > create a cube > Atrribute editor
set the height to 170 (it should be in centimeters by default)

Image Planes

Create an image plane
Panel > Orthographic > Front
View > Camera Attribute Editor
> Environment > Create >
>Placement Extras (To position and scale the image plane)
Try to center the front view and scale it to fit the 170 centimeter reference.
Make sure the feet sit on the base line of the grid.

Repeat in Orthographic > Side

To reselect the image plane at any time
View > Image Plane > Image Plane Attributes > select


 Start at the torso
Create a Cube 4x2x4 divisions
Centre in scene
Channel Box > Translate X and Z to zero

To keep the mesh symmetrical, go to tool settings and turn on Reflection.  Be careful to keep the center line straight and in the center.
Scale to fit over torso, then round out from the Top view.
Work in front and side orthographic views to match the 2D closely.


 Symmetry

Maya reflection works on the movement of vertices. Extruding, adding edge loops or otherwise modifying the topology won't reflect. It's very important to maintain a straight center line in your geometry, so that you can delete half the mesh in face mode and mirror it on occasion.

You can find the mirror geometry tool in Mesh > Mirror Geometry 
If the mirror works in the wrong direction, try changing +X to -X
 

Straight Lines

Finally, as you add more detail to your mesh, and give it form, the loops that cut accross the body and limbs should be kept as straight as possible. The line running down the centre of the body and the centre of each arm and leg should also run as straight as possible.

This will make skinning much, much easier than when working with an uneven mesh.

Lesson 2 - Manmade and Organic Props

in progress

Lesson 1 - Maya Modeling Tools

Box Modeling

Box modeling is the process of starting with a pre-made geometric shape and then cutting into and adding to it to create a finished model.  The process is very manual, but requires you to get comfortable with the basic modeling tools.

The following tutorial is a beginners guide to modeling, but even an advanced modeler, if getting started with Maya for the first time, might find it useful to get familiar with the basic tools.  Follow the bullet points and, if you want more information, read the additional text.

Tutorial
Vase of Flowers


  • Start in Panel > Perspective > persp
Step 1: Create a Cylinder
  • Under the polygon tab, left click the Cylinder
  • Click and drag on the grid to create the base circle
  • Click and drag up from the circle to pull it into a cylinder
  • In the channel box, left click polyCylinder1 and use the settings to the right
    (remember that units in Maya are centimeters)
 Setting the translates to zero will center the object in the scene.  This is more important with characters, but it also makes it easy to combine sets and props later.

Giving the cylinder 16 loops around is a good balance of keeping the object simple, yet giving it enough detail to look good.  Divisions of 4 or 8 will allow you to Quad the cylinder's caps later if it becomes necessary.  The 5 height divisions will give you a good level of detail to start with, but you can add more in as you go.


Step 2: Shape your vase
  • Go to Panel > Orthographic > Front
  • Left click the cylinder to select it, then press 'W' to use the move tool
  • Move the cylinder up until it sits on the ground plane (the dark black line in the grid)
  • Press R' to use the scale tool
  • With your mouse over the cylinder, hold the right button down and select 'Vertex'
  • Left click and drag a box accross a line of vertex and scale it using the centre point of the scale tool.
  • To add more detail, go to  Edit Mesh > Insert Edge Loop Tool and then click on a vertical line of your mesh to create a horizontal one.
  • Work away and keep the loops as even as possible while getting the shape you want.  An extra loop close to the top and bottom of the vase will keep those parts sharper, while broadly spcved loops in between will give an even, smooth finish.
  • Press three to see what it looks like smooth, and 1 to go back to un smoothed.  Try to work mostly with it unsmoothed, but check it once in a while.
  •  

Step 3: The vase interior
  • Go to Panel > Perspective > Persp
  • With the object selected press F to focus on it.
  • Hold alt and use the left mouse button to rotate around and look at your vase
  • Hold the right button down and select 'Vertex' to go back to vertex mode and select the middle vertex on the top of the vase.
  • Hold Ctrl and hold the right button down to open the radial menu.  Select To Faces > To Faces.  This turns your vertex selection into a faces selection, selecting the entire cap of the vase.
  • Go to Edit Mesh > Extrude, and then scale down the cap as if using the scale tool.  This will create new faces within the ones selected.
  • Repeat and this time move the new faces down into the vase.
Try to line up the inside loops with the outside whenever possible.


Step 4: Create a Leaf

  • Under the polygon tab, left click the Cube
  • Click and drag on the grid to create the base
  • Click and drag up from the rectangle to pull it up, but just a little.
  • In the channel box, left click polyCube1 and use the settings to the right to input the settings below.
  • Shape the rectangle into a leaf shape in Panel > Orthographic > Top


Step 5: Refine your Leaf

  • Go to Panel > Perpective > persp
  • Add loops to either side of the leaf with Edit Mesh > Insert Edge Loop Tool
  • In vertex mode, select the center line and pull it down (don't select the points of the leaf)
  • Then bring the loops either side of the center up and model a gentle curve to the leaf


Step 6: Duplicate and Place Leaves in your Vase


Step 7: Create a Stem and Petal


Step 8: Instance some Petals to edit them simultaneously


Step 9: Bend Flower using a Lattice


Step 10: Duplicate and Place Flowers in your Vase